By: Ashley Rivas
Cosplay: We can build this *#$@!
You are excited and eager, and why wouldn’t you be? You bought tons of supplies, have enough pictures to start a fan site, and you’re desperate to justify the money you spent on all of this weird crap (or on setting up that fan site). It may seem like time to jump in to the main act, but it’d be better to take a step back. You’re going to want to prototype.
Proto-whatzit?
Your prototype is your first whack at a design, or a piece of your cosplay. If you’re particularly unsure about making something, you should always prototype it first. Practice makes perfect (or at least acceptable). And this is also a very good way to force yourself to start earlier than your deep dark procrastination urges tell you to. Because procrastination is for junior high book reports, and you are going to be a pro.
These test builds are the best way to:
- See how skilled you are with the specific techniques you’ll need to use
- Test new skills you’ve never tried
- Work with unfamiliar material
- Create a pattern
- Decide which material will work best in terms of looks, time, and cost
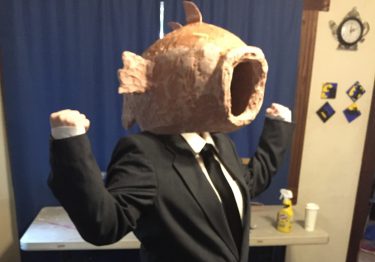
For Business Fish, I actually went through two other head armatures (a wired skeleton acting as the framework of your larger piece) before I settled on the final design. This was time consuming and expensive, but I was not about to settle for something I didn’t like, and neither should you!
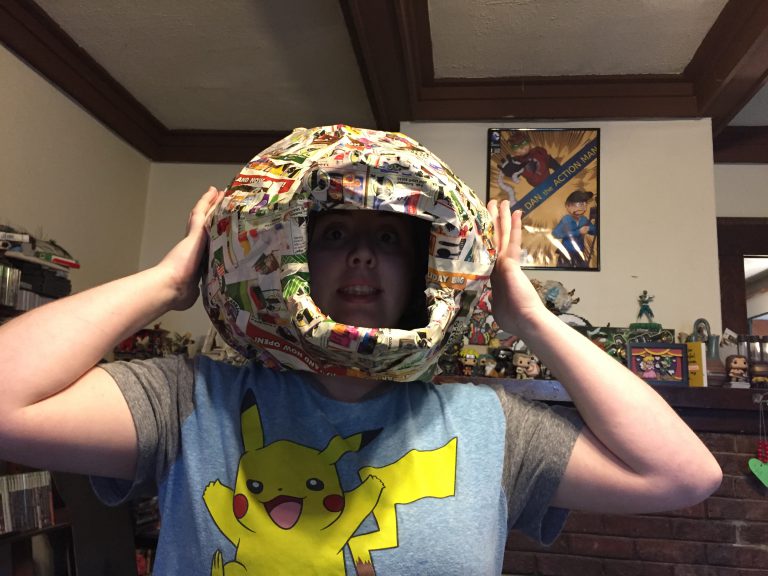
No Business Fish of mine would have buck teeth.
Here’s my general process for prototyping a piece. This is not the hard and fast rule book, but it’s a great place to start before you learn what style works best for you.
- Sketch your design. You may not be an artist, but drawing out what you have planned allows you to see the actual structure of the design before the detail. See the armature, the skeleton, and the base, without any of the clutter on top. Understand what you’re building.
- Get junker material. DO NOT use your final material on a prototype! Because $$$$$$$$$. Save that good, expensive fabric for the real deal.
- Take notes and lots of pictures as you start your build. This will help you see what you did right if you decide to replicate, and avoid all of those nasty oopsies later.
- Take your time experimenting with the materials. You’re making something new, and if you want it to look good, you need to understand what you’re working with. Now is the time to play around! Work that material, run it through your machine with different stitches, and slap some paint on it. This is the best opportunity to take risks, because doing it later on your finished piece will not pay off (usually).
- Wrap up your design. This is a big question mark, depending on your design. Do you like where it’s headed? Then finish it. Do you hate it? Then stop. Are you unsure? It’s better to finish it, because a lot of cosplay will look better or worse when it’s done.
- Test your design. If it’s bad or good, this is important. You need to wear it and see what you love or hate about it. Put it in context if you can, and add some of your other test accessories if you’ve got them.
- Assess! Really decide what you love or hate, and if this is what you’ll use moving forward. You’ve got to get ready to commit to the things that worked, and scrap the things you hate.
At this point, if it all worked out and you love this design, it can be the start of your final product. It just went from wonky shield test to the base of the finished piece, which is awesome!
If, however, you hate it, don’t collapse into the infinite abyss of sorrow just yet. You’ve assessed what you like and hate about it and are ready to move forward to the next one. Rinse, repeat, and try it again. I generally advise waiting a day or two before hitting the final nail into a prototype’s coffin, and getting a second opinion is always an excellent idea. I have had many collapses and breakdowns that were leveled out by my best friend, who also cosplays to an obsessive level of detail and understands where I’m coming from when I saw it “just doesn’t look fishy enough.”
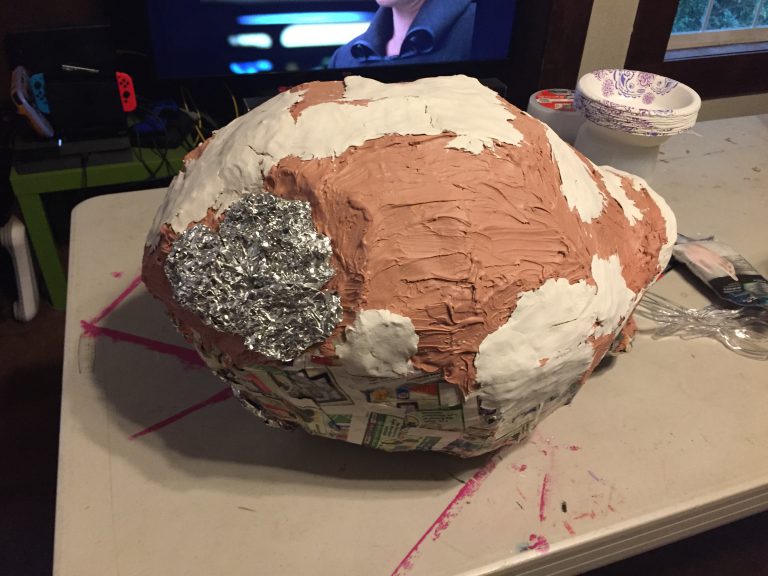
There’s a lot that’s fishy about this, just not in the right way.
We can rebuild it. We have the technology.
So by now, you’ve got a prototype that you’re happy with. It’s graduated into your base, and it’s ready for the main construction phase.
Main construction: Engage!
The process from this point depends largely on your individual cosplay, so to help give a guideline of a general process, here’s how my Business Fish construction happened. Spoiler alert: it was a mess.
Step One: The fish bones
I started with the first head, which was a floral wire/heavier gauge armature wire. It was a solid start, but I felt that it was a little bigger than I wanted. It wasn’t until I slapped on the first layer of paper mache that I knew it was definitely too big.
I was more than a little fussy about this, but I powered through and added a little bit of Bondo. That’s when it became painfully clear that the weird shape of the armature had left strange gaps in the paper mache, and I’d have to use too much Bondo to level it out to be practical. Anything else (paper clay, aluminum foil, foam) would add up in cost and wouldn’t adhere well to the Bondo.
I threw the big old mess into the trash and moved on to another armature, with only floral wire this time. I figured it would create less of a dent in the paper mache structure, and it’s the most pliable kind of wire (though noticeably weaker). This worked for a bit, bit trying to do a round dome was ugly, and I wasn’t going to waste time on it. Plus, my cat really liked it (win!).
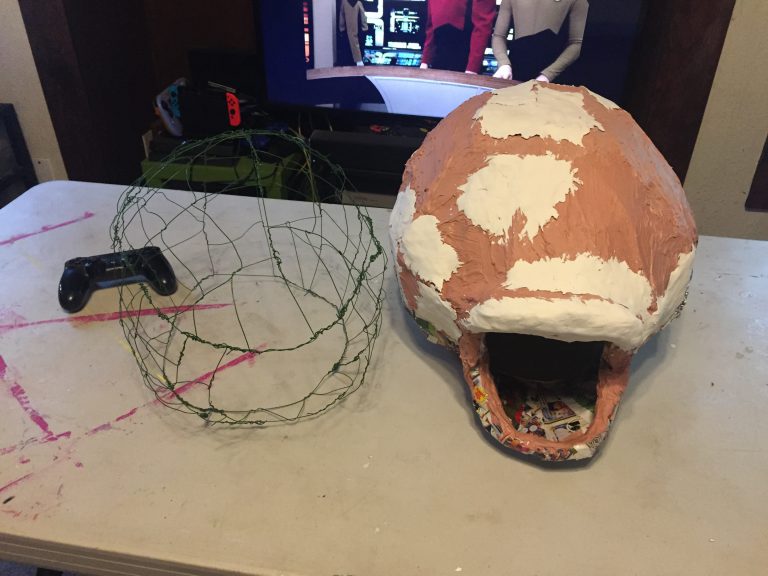
New on the left, old on the right. Next Generation on the TV.
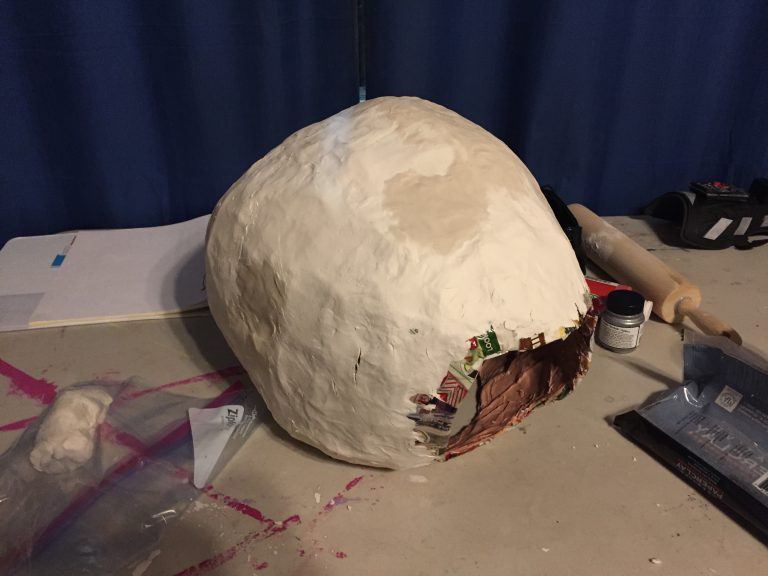
Armature #3 was the golden egg. I looked up so many Business Fish pictures and traced over them to understand the shape, and I realized how I needed to elongate more and make it a little smaller to get that fish shape. With the armature done, paper mache commenced. I love this type of craft for cosplay because it’s cheap (get free flyers from a Dollar Tree or save your newspapers) and it’s still sturdy.
Step Two: Making the head pretty
After this, the head moved to the smoothing out stage. I started with paper clay, which I love more than paper mache. It’s so smooth, flexible, and it dries sturdy. The only con: it’s expensive and you use it fast, so that adds up. It does take a little longer to dry depending on how thickly you apply it.
After I evened out the lower spots, Bondo got splattered all over the place. Bondo is messy and I knew I had to sand it, so I tried to keep things as level as I could. Sanding was absolute torture, so I bought the electric hand sander. BEST. PURCHASE. Please buy yourself a Dremel or a sander if you think you’re going to do a lot of self construction. They save more time than you realize.
Finally, I did a spot check and looked for areas that needed a bit more work. Bondo spot putty worked best here, since it dried the fastest. Then, a solid coat of wood glue took care of more of the tiny divots and cracks.
I’d already attached the fins and the tail during the main Bondo phase. They got a quick attachment with hot glue, then the more thorough seal came from the paper clay and Bondo. They actually stayed on really well, but I wish I had reinforced the tops of the fins. They ended up snapping during the con.
Step Three: Eyeballzzz
Eyes were the worst part for Business Fish. His eyes in the stickers are small in relation to the body, and they’re googly and don’t look in the same directions. It was hard to really see what kind of proportion or placement I wanted, so I just jumped straight into construction with a handful of materials. I tried these large plastic emoji toys I found for $1, and I tried gluing the round halves of Easter Eggs together. My sweet, kind husband said Ping-Pong balls seemed good. I scoffed. “Too small,” I grumbled.
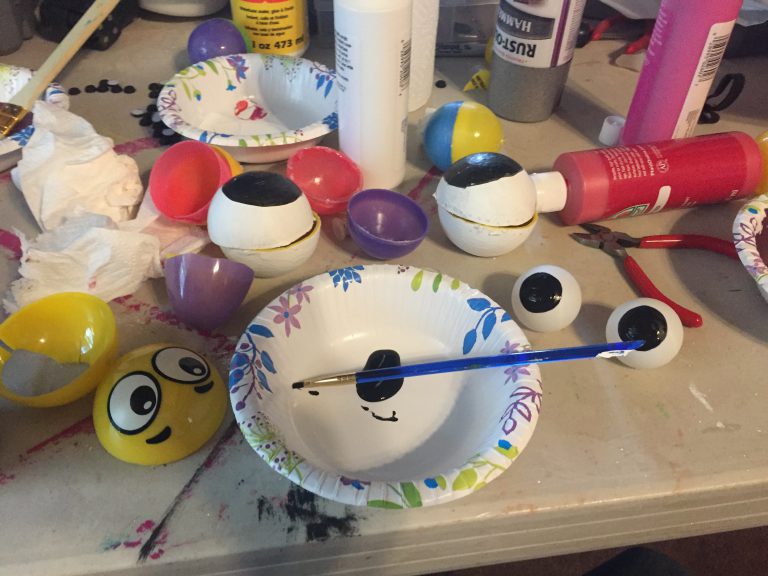
Easter eggs, Ping-Pong balls, and gutted emojis.
Well, the emoji eyes and the Easter eggs were too big. Ping-Pong balls sealed the deal, and they stayed on with a little bit of hot glue. The moral: Try lots of things. The thing that you think will work might not actually be the best bet in the long run. Also, don’t give excessive snark to the person suggesting something; see if their idea is any good first, then give lots of snark.
That is the saga of the Business Fish head, with all of its trials and tribulations. Hopefully this process gives you a little insight into what it’s like to try and build something in stages, and revise it instead of throwing everything into a cleansing flame salted with your tears.
For our final installment, we’re going to cover wearing this junk, and how awesome conventions are in that cosplay you spent tons of time on.



No Comments on "Cosplay: If you build it, the nerds will come"